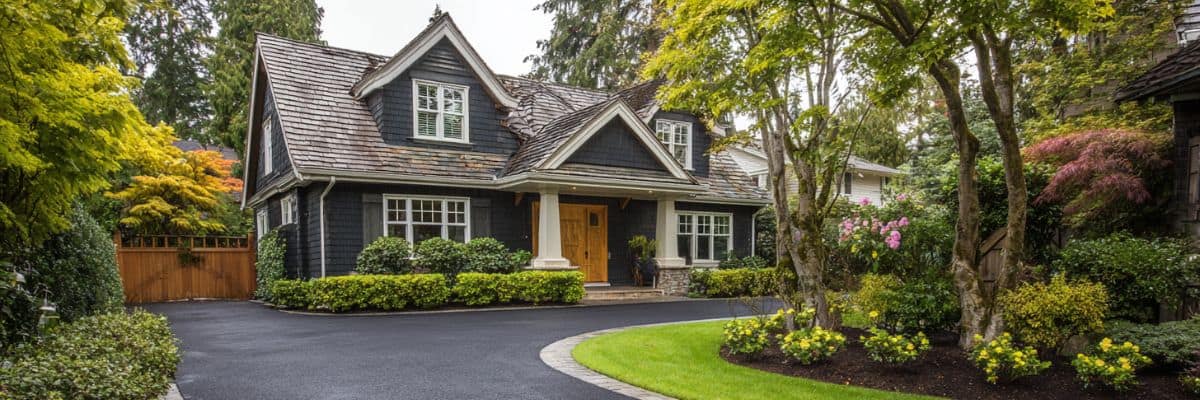
Seattle Driveway Replacement: Codes and Permits Guide
Replacing a driveway in Seattle means dealing with a tangle of city codes and permits—something most folks don’t realize until they’re knee-deep in the project. In Seattle, driveway replacement usually calls for a Street Use permit if the work touches the right-of-way. That permit, managed by the Seattle Department of Transportation (SDOT), covers both the curb cut and driveway construction in a single application.
The rules get complicated because the city has authority over the land between the street and your property line. Whether you need a permit depends on the project’s scope, if you’re changing curb cuts, or how your driveway connects to city streets. Knowing these requirements before you start can save you a lot of headaches, not to mention money.
Seattle’s permit process isn’t just about construction approval—it also wraps in safety, environmental impact, and coordination with other city departments. The requirements shift depending on whether your project is just a driveway or part of a bigger construction permit. You really want to figure out which rules apply to your situation before you even think about breaking ground.
Overview of Driveway Replacement Permits in Seattle
Seattle expects permits for most driveway replacement jobs, but what you need depends on where and how much you’re doing. The Seattle Department of Construction and Inspections (SDCI) handles anything building-related, while SDOT takes care of curb cuts and anything in the right-of-way.
When a Permit Is Required
If you’re replacing a driveway and making structural changes or touching public right-of-way, you’ll need a permit. Cutting into an existing sidewalk for a new curb cut? That’s a curb cut permit from SDOT, no question.
If you’re changing the footprint, grade, or the way water drains, you’ll probably need a construction permit from SDCI. Adding lighting or a gate? That’s a separate electrical permit.
Anything that spills into city sidewalks or the street needs a permit. The city defines driveways as the bits of street, alley, or property that let you get to off-street parking through a curb cut.
You can check what permits you’ll need through the Seattle Services Portal or by calling SDCI. Every project gets its own review, so there’s no one-size-fits-all answer here.
Types of Permits for Driveway Projects
Construction permits cover most work on private property. These make sure you’re following building codes, drainage rules, and setbacks.
Street Use permits are for any concrete, curb cut, or driveway work in the public right-of-way. SDCI will still want to check how the work ties into your property.
Grading permits come into play if you’re moving a lot of dirt or changing the slope. They’re mostly about drainage and erosion control.
If your project changes during construction, you might need a building permit revision—that lets you tweak your plans without starting the whole process over.
Common Exemptions
If you’re just resurfacing the driveway—no structural changes—you might be exempt. Swapping out the old pavement for new stuff with the same dimensions? Often, no permit needed.
Small repairs, like crack filling or a new layer of sealcoat, usually don’t need permits either. Still, whatever you do has to meet current code requirements.
If you’re not changing drainage, grade, or curb cuts, you’ve got a better shot at an exemption. Always double-check before you start—nobody wants to get dinged for a violation after the fact.
Understanding Relevant Seattle Codes and Regulations
Driveway replacement in Seattle means following a whole stack of codes. These cover building standards, land use, street access, and how you handle water runoff.
Seattle Building Code and Residential Code
The Seattle Building Code (SBC) lays out minimum standards for driveway construction and changes. If you’re making structural changes or putting in something new, you’ll need a building permit.
The Seattle Residential Code (SRC) applies to houses, duplexes, and townhouses (three stories or less). It covers things like:
- Surface materials and how thick they need to be
- Slope and grading for proper drainage
- Width and clearance requirements
- How you connect to existing buildings or garages
When you submit for a permit, you or your contractor need to use the current version of these codes. The city wants licensed contractors who actually know the local rules.
Land Use Code and Zoning Requirements
Seattle’s Land Use Code dictates where you can put a driveway on your lot. Zoning rules control setbacks and how much of your property you can pave over.
Some of the main zoning things to watch for:
- Setbacks from the front property line
- Side yard clearance—distance from your neighbor’s property
- Impervious surface limits—basically, how much pavement is allowed
- Tree protection during the work
Always check your zoning before you start. Certain neighborhoods have their own design rules that can affect what your driveway can look like.
Street and Sidewalk Use Rules
SDOT handles anything that touches public streets or sidewalks. If your driveway project impacts the right-of-way, you’ll need a street use permit.
Some street connection requirements:
- Curb cut permits—for any new or changed driveway entrances
- Sidewalk restoration if you dig things up for utilities
- Traffic control while you’re working
- ADA compliance for accessible routes
The city will inspect these connections for safety. Contractors have to coordinate with SDOT before starting anything near public areas.
Stormwater and Drainage Regulations
Seattle’s stormwater code says new driveways need proper drainage systems. You’re responsible for making sure runoff doesn’t cause flooding or pollute streams.
Stormwater management covers:
- Drainage calculations—based on area and what materials you use
- Retention systems if your property is big enough
- Permeable surfaces (sometimes required)
- Connection permits for tying into the city’s storm system
The side sewer code covers how you connect your drainage to city pipes. If you’ve got a tricky site or a steep slope, you might need an engineer to take a look.
Navigating the Permit Application Process
The application process for a driveway permit in Seattle runs through the Seattle Services Portal and requires specific documents. You’ll need site plans, and the timeline for review really depends on how complicated your project is.
Creating an Account on the Seattle Services Portal
First step: register for an account on the Seattle Services Portal. That’s where all construction permits live now.
If you’re new, you’ll enter your contact info and confirm your email. If you’ve already got an account, just log in.
Once you’re in, head to “Home” and pick “Permits – Street Use” under Create New. For driveway work, open up “ROW Construction” and select “ROW Construction Permit.”
You’ll need to list four contacts for each application:
- Applicant – whoever is filling out the application
- Owner – property owner or the contractor
- Financially Responsible Party – who’s paying the fees
- Onsite Contact – someone available during construction
Required Documentation and Site Plans
SDCI and Street Use permits need different document sets. Get your paperwork together before you start the online application.
What you’ll need:
- Letter of Authorization (if you’re not the owner)
- ROW Impact Plan showing any temporary street uses
- SDCI Site Plan with property measurements and what’s already there
- Project details and your construction timeline
The ROW Impact Plan helps reviewers see how you’ll affect street access and safety. Site plans need to show what’s there now and what you’re planning, with real measurements.
You’ll upload everything in the portal—just pick the right type from the dropdown. If something’s missing or mislabeled, the system won’t let you submit until it’s fixed.
Application Review and Timelines
How long it takes? Depends on the project and if you’re touching the right-of-way. Simpler replacements usually move faster than big jobs with street changes.
SDCI reviews the construction piece, SDOT handles the street stuff. If both are involved, you can’t get the Street Use permit until SDCI signs off on the construction permit.
You’ll get a record number that starts with SUCONST when you submit. Watch your email for confirmation, and you can check the status in the portal.
If reviewers need more info, they’ll reach out. For questions or updates, email the Street Use team with your record number in the subject line.
Driveway Design, Safety, and Environmental Considerations
Seattle driveways have to meet design standards for accessibility and also deal with environmental risks—like flooding, landslides, or earthquake zones. The city enforces floodplain rules and special protections for environmentally sensitive areas.
Design Standards and Accessibility
All driveway designs in Seattle must be ADA-compliant. The steepest allowed slope for accessibility is 8.33% (that’s a 1:12 ratio).
For width, residential driveways need at least 10 feet for one car, 20 feet for two.
Some other design must-haves:
- Max 15% grade for standard driveways
- Proper drainage into city storm systems
- Clear sight lines at intersections
- Enough turning space for emergency vehicles
The city might require a design review if you’re in a historic district or a special zone. You’ll need to submit detailed plans showing slope, materials, and drainage.
Driveways should connect to sidewalks without tripping hazards or blocking pedestrians.
Environmentally Critical Areas and Hazard Zones
Seattle marks out environmentally critical areas that need special permits for driveway work—think steep slopes, wetlands, or wildlife habitats.
If you’re in a landslide-prone zone, you’ll need a geotechnical report before starting. The city maps out these risk areas based on soil and slope data.
Seismic design matters too, since Seattle’s in a high-risk earthquake area. That means:
- Proper soil compaction
- Reinforced concrete as needed
- Flexible joints for ground movement
Driveways in landslide risk areas need extra engineering review. You’ll have to show your design won’t make slope stability or runoff worse.
For driveways near streams, wetlands, or protected habitats, you might need an environmental impact assessment before you can build.
Floodplain and Drainage Requirements
Seattle’s floodplain development regulations put some serious limits on driveway construction in flood-prone spots. The floodplain development code means you’ll need special permits and probably some creative, elevated construction methods.
If your property sits in a 100-year flood zone, you’ll have to meet certain elevation rules. Driveways can’t mess with natural water flow or bump up flooding risks for the neighbors—Seattle’s pretty firm on that.
Stormwater management requirements include:
- Pervious pavement materials in sensitive areas
- Proper grading to direct runoff away from buildings
- Connection to city drainage systems
- Retention pond installation for large driveways
The city wants to see detailed drainage plans that explain how you’ll handle surface water. You have to prove your driveway won’t overload what’s already in place.
Special permits are needed if your driveway will change natural drainage or require fill in flood zones. Expect extra review time and more engineering hoops to jump through for those projects.
Inspections and Final Approvals
Seattle doesn’t mess around with inspections when it comes to driveway replacement. You’ll need to schedule several checks to make sure everything matches city codes and is actually safe. These inspections happen at certain points in the project, and you can’t use the new driveway until you’ve cleared all the hurdles.
Required Construction Inspections
Driveway replacement projects in Seattle mean multiple construction inspections at different stages. The city wants to be sure you’re following the rules and installing things the right way.
The first inspection usually happens during excavation and base prep. Inspectors check the depth and make sure the base is compacted like it’s supposed to be.
Next up, there’s an inspection for the concrete pour or paving. This is where they look at materials and see if you’re sticking to the plans.
Side sewer inspections might be needed if your project touches the existing sewer lines. You’ll have to set those up separately from the standard inspections.
Residential inspection rules apply to single-family homes and duplexes, but if you’ve got a multi-family property, expect a few more requirements.
All inspections get scheduled through the Seattle Services Portal at cosaccela.seattle.gov. You can request inspections, see results, and keep tabs on your project online.
Correcting Deficiencies and Reinspections
If inspectors find problems or code violations, you’ll have to fix everything before moving forward. Seattle inspectors give you a written list of what’s wrong and what needs fixing.
Issues like bad drainage slopes, a poorly prepped base, or the wrong materials come up a lot. Contractors need to sort these out before asking for a reinspection.
There’s an extra fee for reinspections if you don’t pass the first time. Everything has to be corrected before you can schedule another visit.
Reinspection requests also go through the Seattle Services Portal. An inspector will come back to check that all the flagged issues are actually fixed.
Too many failed inspections can drag out your project. Working with contractors who know Seattle’s codes can save you a lot of headaches.
Receiving the Final Approval
When construction’s done and you’ve passed the earlier inspections, there’s one last check. The final inspection makes sure everything matches the approved plans and that you’ve hit all the city requirements.
Inspectors look at grading, drainage, and how everything connects to the existing infrastructure. They’ll also check that the driveway surface is up to spec.
If you pass, the city gives you the green light to use your new driveway. That closes out the permit, and you get official documentation through the Seattle Services Portal.
The final approval usually comes within a day or two after the last inspection, but it might take longer if other city departments need to weigh in—especially if there were side sewer changes.
Special Situations and Additional Requirements
Some driveway replacement projects in Seattle come with extra hoops. If your property is historic, near the shoreline, or has accessory dwelling units, there are specific code compliance issues that property owners need to figure out before starting work.
Driveway Replacement for Accessory Dwelling Units
If you’ve got an accessory dwelling unit, the parking rules get stricter when you redo your driveway. The Land Use Code spells out exactly how many spaces you need for ADUs.
Each ADU has to have its own parking spot, and the driveway needs to fit both the main house and the ADU parking.
Key ADU Driveway Requirements:
- Minimum parking space dimensions of 8.5 feet by 18 feet
- Clear sight triangles at street connections
- Adequate maneuvering space for vehicles
- Compliance with slope requirements for accessibility
Your permit application should show how the new driveway handles parking for both units. SDCI checks for ADU parking compliance as part of the process.
You can’t cut down on required parking spaces when replacing a driveway. The design needs to keep or improve what’s already there.
Historic and Shoreline Properties
If your property is in a historic district or near the shoreline, expect extra approvals before you can touch the driveway. These areas are protected under Seattle’s codes.
Historic properties need a green light from the Landmarks Preservation Board, which looks at how your project might change the property’s historic vibe.
Shoreline properties fall under the Shoreline Master Program, which covers work within 200 feet of water.
Required Reviews:
- Historic district approval for design changes
- Shoreline substantial development permits for major alterations
- Environmental review for sensitive areas
- Public disclosure requirements for certain projects
The permit process drags out longer for these properties, so plan for extra time and maybe some design tweaks along the way.
Compliance with Other Seattle Ordinances
Driveway replacement in Seattle isn’t just about pouring concrete—there’s a tangle of city codes you’ve got to navigate. Noise ordinances, for example, put a cap on when and how long you can make a racket.
Generally, you’re limited to working weekdays, 7:00 AM to 6:00 PM. Trying to work on weekends? That’s a whole process—permits, notifying neighbors, the works.
Additional Compliance Requirements:
- All contractors need to be properly licensed for their trades
- Keep noise down, even during allowed hours
- Dispose of waste and recycle according to city rules
- Street use permits are needed if you’re staging equipment on public property
Seattle wants to see proof of a valid business license before they’ll hand over any permits. They’re pretty strict about that.
Even if you hire a contractor, you’re still on the hook for making sure everything’s by the book. If something’s off, you could be facing stop-work orders or extra fees. Not exactly what anyone wants.